A desiccator is a sealed, airtight container used in laboratories to maintain a low-humidity environment for moisture-sensitive materials. It protects hygroscopic substances (those that readily absorb water from the air), prevents unwanted hydration or degradation, and ensures accurate weighing or storage of dried samples.
Primary Purposes in the Laboratory
Cooling heated objects — After drying samples in an oven or heating them (e.g., crucibles, weighing bottles, or chemicals), place them in the desiccator to cool without absorbing atmospheric moisture, which would affect mass measurements.
Dry storage — Long-term preservation of hygroscopic reagents, standards, analytical samples, or moisture-sensitive compounds (e.g., salts like NaOH, KOH, or certain pharmaceuticals).
Maintaining dryness — For gravimetric analysis, weighing to constant weight, or protecting substances during short-term exposure outside other controlled environments.
Vacuum applications (in advanced models) — Faster moisture removal or storage in near-absence of air/oxygen.
It is not primarily a drying device for wet samples (an oven or other method is used first); rather, it maintains already-dried items in a dry state.
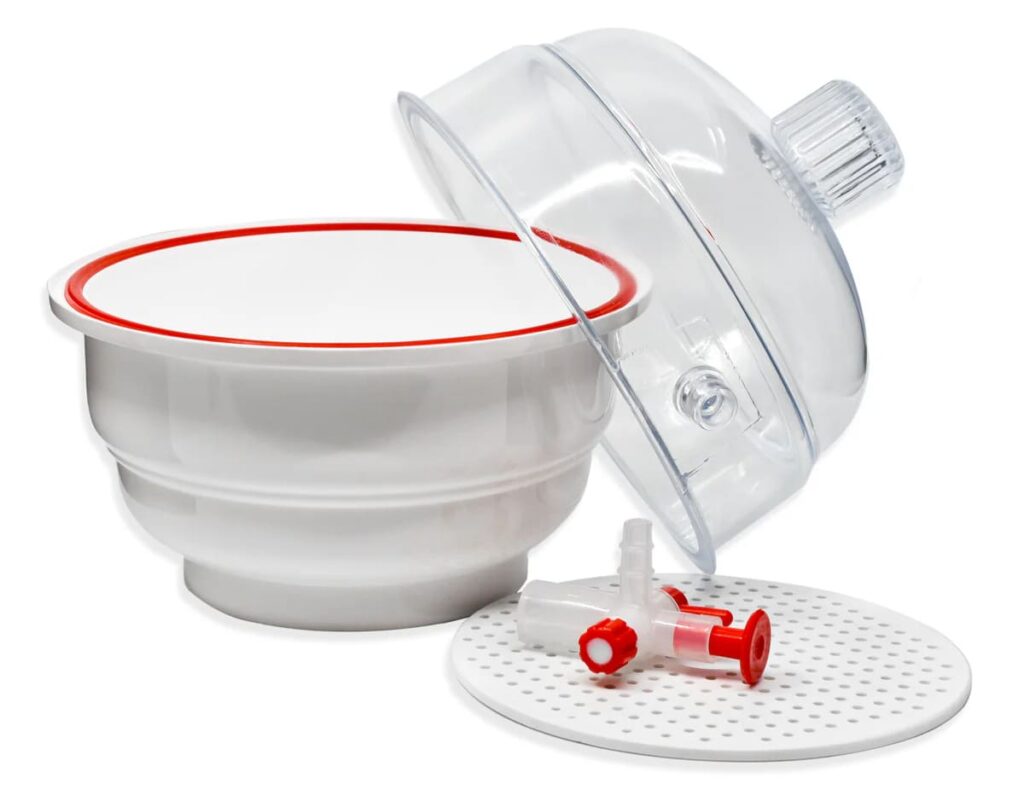
Here are some typical laboratory desiccators:
Common Types of Desiccators
Standard (non-vacuum) — Most common; relies on desiccant alone; economical and widely used.
Vacuum desiccator — Has a stopcock/tap for connecting to a vacuum pump; removes air and moisture faster; ideal for highly sensitive materials.
Gas-purge — Uses dry inert gas (e.g., nitrogen) flow.
Automatic — Built-in regeneration of desiccant (heating/fans); minimal monitoring needed.
Common Desiccants Used
Silica gel (often with blue-to-pink color indicator).
Anhydrous calcium chloride (CaCl₂)
Drierite (calcium sulfate)
Molecular sieves
Many change color when saturated (e.g., blue → pink), signaling the need for regeneration (heating in an oven) or replacement.
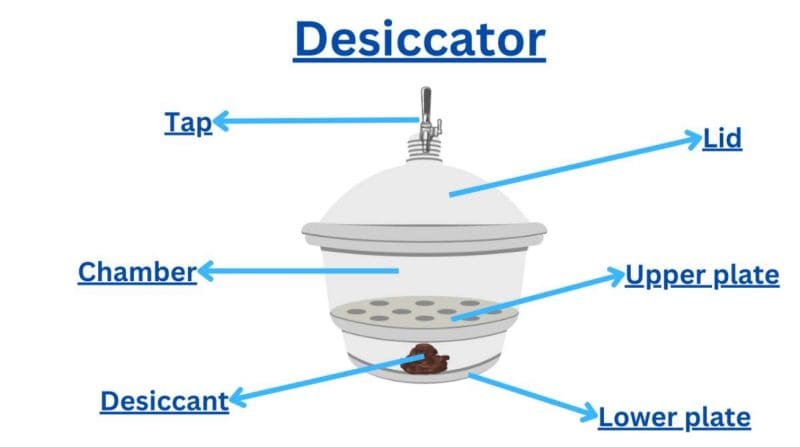
Basic Structure (Typical Non-Vacuum Desiccator)
Lid (ground glass or greased seal for airtight fit).
Upper perforated plate/platform (holds samples like crucibles or watch glasses)
Lower compartment (holds desiccant)
Body (usually heavy glass, sometimes plastic or polycarbonate in modern versions)
Here is a labeled diagram of a classic desiccator setup:
How to Use a Desiccator (Standard Procedure)
1.Prepare — Ensure the desiccator is clean. Add fresh, dry desiccant to the bottom compartment (below the perforated plate). Check color if it has an indicator.
2.Open — Hold the base steady with one hand. Gently slide the lid horizontally (do not lift straight up, as this breaks the seal abruptly and can cause turbulence or sample disturbance).
3.Place samples — Use tongs or forceps. Put hot/warm items (e.g., crucibles) on the perforated plate or in watch glasses. Avoid direct contact with desiccant. Do not overcrowd.
4.Close — Slide the lid back on smoothly until fully sealed. Grease on the rim (silicone or vacuum grease) ensures an airtight seal.
5.Wait — Allow cooling/storage time (at least 5–15 minutes for cooling before weighing; longer for storage).
6. Open after use — Slide lid slowly again to avoid sudden pressure change or dust entry.
For vacuum types: Connect to pump, evacuate air, close valve, and monitor as needed.
Practical Tips
Lightly grease the lid rim (with vacuum grease or petroleum jelly) for an airtight seal.
Place desiccant below the perforated platform; never let samples touch it directly.
Open/close the lid slowly to minimize air exchange and turbulence.
For vacuum models: Apply vacuum gradually; avoid sudden pressure changes to prevent implosion (use safety shields if glass).
Monitor desiccant color and regenerate/replace when saturated.
Never place very hot items in a vacuum desiccator immediately—allow partial cooling first.